Engraving Your Way To Greater Success: 5 Ways To Engrave Your Business Name and Logo
In the ever-growing world of business and marketing, there are so many ways to stand out from the crowd. and engraving is one of the best ways to make that happen.
In the ever-growing world of business and marketing, there are so many ways to stand out from the crowd. The problem is that there are so many options it’s a little overwhelming. We all have that one friend who seems to know everything about brands and branding. They know exactly how to make their business engraving look as good as it can, with logos and brand images everywhere they go. So what makes this so special? It’s because brands and logos are an easy way for people to recognize your business at first sight.
5 Reasons to Add an Engraving Logo to Your Marketing Strategy
If you’re looking to take your business to the next level, a good way to do that is by personalizing your goods and services. There are a lot of ways to do this, but one of the easiest is by adding an engraved logo to your goods. Branding and marketing are two of the most important aspects of any business. While they both play an important role, they can also be very difficult to master. There are a lot of ways to market your goods and services, but an easy way to create a personal touch is with an engraved logo. Engraved logos are not only a great way to brand your business, but they are also a way to make your goods more valuable and memorable. Customers will have a lasting impression of your brand and logo and be more likely to remember your business.
Know Your Audience
Before you do anything, it’s important to get to know who your customers are. This will help you determine what kinds of goods and services you should be offering. You don’t want to be wasting your time or money on products or services that no one wants. A great way to get an idea of what your customers want is to do some research. You can do this by asking your customers what they would like to see from your business. You can also rely on social media to get a general idea of what people want. You can take things a step further by conducting surveys. Surveys are a great way to get a better idea of what your customers are looking for. You can ask questions related to your products and services and see what people have to say.
Be Unique
One of the most important aspects of branding is standing out from the crowd. You want to make sure that your products and services are different from everyone else’s. This is one of the easiest ways to make your business unique. If you’re offering engraved products, you want to make sure that your designs are one of a kind. There are tons of other businesses offering engraved products, so you have to make sure that yours are different. Doing something as simple as adding your business name to the products or adding a custom design to them can go a long way. Engraving your business name or logo onto your products is one of the easiest ways to make them unique. Your customers will instantly know that your products are different than the others.
Be Visible
Another important aspect of branding is making sure that your products are visible. You want to make sure that people know about your products and what they can do for them. One of the easiest ways to make sure your products are visible is by placing them in different areas or even stores. You can do this by getting a booth at trade shows, conventions, and other Dallas events. You can also place your products on websites like Amazon or eBay. Another option would be to sell them in physical stores. You can make sure that your products are visible by engraving them. Engraved products are great because they can be seen and easily accessed. Your products will be sitting on shelves, online, or in booths for everyone to see and purchase.
Be Responsive
One of the best ways to make your products relevant is to make them personalized. Personalizing your products is a great way to make them relevant to customers. You can do this by adding engraving to your products. Adding engravings to your products is one of the easiest ways to make them more relevant. Engraving your products is a great way to make them more personal and relevant to customers.
Show You Care
Another important aspect of branding is showing that you care about your products and customers. This can be done through many different aspects of your business, but especially your products. You want to make sure that your customers know that you care. This is one of the best ways to show that you care about your products and customers. You can add engravings to your products in a variety of ways. You can add your company name, a short saying, or even a message from your customers. You can also add your name along with other personal information.
Wrapping Up
As you’ve read, there are a lot of ways to increase your brand recognition and make your business stand out from the crowd. One of the easiest ways to do this is by adding an engraved logo to your products. Branding and marketing are two of the most important aspects of any business. While they both play an important role, they can also be very difficult to master. There are a lot of ways to market your goods and services, but an easy way to create a personal touch is with an engraved logo. Engraved logos are not only a great way to brand your business, but they are also a way to make your goods more valuable and memorable. Customers will have a lasting impression of your brand and logo and be more likely to remember your business.
Contact White Dog Engraving
For more information about our DFW engraving service contact us today (972) 848-7790 or click here.
Engraving 101: Tips for a Lifetime of Quality Engraving
Before you operate your new engraving machine for the first time, it’s essential to have a thorough understanding of the nuances that come with operating such a device. If you’re already comfortable with general woodworking and have operated numerous machines in the past,
Before you operate your new engraving machine for the first time, it’s essential to have a thorough understanding of the nuances that come with operating such a device. If you’re already comfortable with general woodworking and have operated numerous machines in the past, you’ll likely find that operating an engraver is relatively straightforward. However, if this isn’t the case for you, worrying about learning the ins and outs of your new equipment could be quite overwhelming. This blog post will serve as an introductory guide to help get you started in the right direction when using an engraving machine for the first time. Read on to learn more about general tips on using an engraver, which tool accessories are most helpful when operating one and more!
Know your Engraving Machine
When you first start operating your engraving machine, it’s essential that you have a complete understanding of the machine itself. Some of the key areas to focus on include your machine’s motor and power source, spindle diameter and speed, table size and surface, as well as any onboard controls. When it comes to your engraving machine’s power source, you’ll find that there are two main types to choose from - direct current (DC) and alternating current (AC). With DC machines, the current flows in one direction, while in AC machines the current flows back and forth. This difference is important to keep in mind, especially if you’re planning on purchasing a new machine. Next, you’ll need to familiarize yourself with the diameter and speed of your spindle. The spindle is essentially what transfers the electricity from your machine’s motor down to the engraving tool itself. Based on the machine you’ve purchased, the spindle’s diameter and speed will differ. Table size and surface type are also essential factors to consider. The table is the surface that your workpiece rests on while the engraving process is taking place. Typically, the table is made out of flat, hard and smooth materials, such as aluminum or glass. Finally, you’ll need to understand the machine’s onboard controls. Typically, you’ll find that engraving machines offer varying degrees of control, depending on the model you choose. Some machines offer manual speed control, while others feature a digital proportional control with adjustable speed settings.
Use the Right Tools for the Job
When setting up your engraving machine, it’s essential that you have the appropriate tools on hand. Your engraving machine comes with a spindle, collet and tool rest, which are the three main pieces of equipment that you’ll need to get started. The collet is responsible for holding the end of the engraving tool in place. There are three main types of collets you should be aware of - end collets, internal collets and external collets. End collets are the most common and are usually used for general engraving. Internal collets are typically found on rotary engraving machines and are used for holding rotary tools. External collets are generally used for texturing or engraving with a stylus. The spindle is the part of the engraving machine that houses the collet. There are two main kinds of spindles - bolted and threadless. Threadless spindles are the most common and are easy to use, as you simply place the collet in the spindle and tighten the knob to secure it in place.
Take Safety Seriously
When it comes to operating a new engraving machine, safety should be your number one priority. While you likely won’t encounter any significant issues when operating your engraver, you should take safety precautions just to be safe. First and foremost, if you’re in a garage or shop environment, be sure to wear hearing protection to help reduce sound-induced hearing loss. Always keep your machine unplugged while setting it up, operating it or performing routine maintenance. This is essential to help prevent any accidental electrocutions. Always protect your hands by wearing gloves when handling metal tools, collets and spindles. Additionally, it’s a good idea to wear eye protection and a face shield to help protect against metal shavings, dust and other airborne particles.
Always Start with a Test Run
When you’ve chosen your tool, set your machine up and are ready to get started, always start with a test run before engraving your final piece. This is a good idea for a few reasons. First, it will help you get a feel for how the machine operates and how long it takes to carve out each letter. Secondly, it will give you the opportunity to test out the machine’s speed and make adjustments, if needed. Finally, it will help you identify any potential problems that may arise.
Don’t Forget to Plan Your Engraving
Once you’ve got your engraving machine set up and ready to go, it’s essential that you have a vision for your design written down before you begin. This will help you to stay on track and prevent you from wasting time by having to start over. There are a few factors to keep in mind when planning your engraving. For starters, you’ll need to decide on the type of tool you’ll be using. There are two basic types of engraving tools - rotary and linear. When it comes to linear engraving, you’ll want to use a longer, slower stroke. This will help minimize vibration and reduce your risk of overheating the tool.
Wrap Up
Now that you’re familiar with the ins and outs of using an engraving machine, it’s time to put your newfound knowledge into action. When it comes to operating an engraver for the first time, it’s important to understand that it’s a skill that takes time to develop. With practice, you’ll get more comfortable with your machine and eventually be able to produce high-quality, precision-engraved pieces time and time again. Engraving is a worthwhile craft that’s as old as time itself and can be enjoyed by hobbyists of all ages and skill levels. With the right engraving machine and a bit of practice, anyone can become a skilled engraver!
Contact Us
For Dallas Texas engraving, contact us today by clicking here.
HOW TO LASER ENGRAVE FOR DUMMIES: START TO FINISH GUIDE
Prior to starting a project, make sure that you have already done your machine setup, mirror alignment, and ramp test. You might also benefit from running some test cards or downloading some libraries if you need an idea of where to start (all available from the OMTech Facebook group).
LASER ENGRAVING MATERIAL LIST
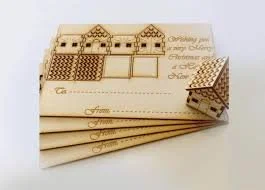
To make these Holiday Tags with your CO2 laser engraver, you will need the following materials:
1 sheet of 1/8 baltic birch for the top layer
I paint and then mask prior to cutting
1 sheet of 5/32 maple
I mask this as well
Super glue
Ribbon/ twine/ string
You can, of course, select whatever materials you would like to use to make this project. I personally really like the contrast between the white and darker woods, but you can use whatever you like. I suggest using a thinner wood for the top layer so it doesn't look too bulky, but that is up to your personal taste.
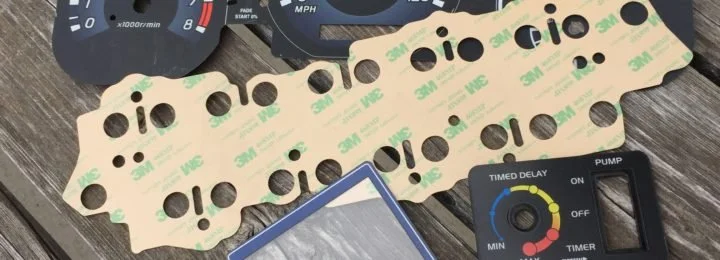
MASKING BASICS: HOW TO MASK WOOD FOR LASER ENGRAVING
If you are new to the laser community and unsure of what exactly masking is, masking is a type of thin, paper-based tape that you can adhere over your wood or acrylic, so when you cut and engrave, you will have lovely, clean designs with minimal char. Many people who have upgraded air assist may not need to do this, but I find that it gives the most pristine results, which is why I prefer to do it with my projects. The downside is it can become a potential fire hazard (especially with acrylics), so make sure to watch your machine and be on standby.
I have primarily used 4075-RLA paper-based masking, and it has worked great for a variety of woods, acrylics, and even faux laser-safe leathers that I have used.
Masking usually comes in a large roll. I have seen 6 inch and 12-inch rolls and have used both without issues. Simply layout your material, peel roughly a 21-inch strip of masking, and then cut it with scissors or a utility knife. I purposely leave it a little long, so I can strip the sides if needed. Then once you have your masking ready, simply lay it down on the material (I prefer left to right) and gently flatten it as you push it over the entire material. Once it’s on there, you can use a card or plastic scraping tool to go over it to make sure it adheres correctly.
Another great part about masking is that you can spray paint, stain, or brush paint your wood prior, let dry, and then mask it. So when you engrave and cut it, you will have clean results and non-painted or no-mess edges!
THE BASICS: HOW TO USE LIGHTBURN
In LightBurn, there are a couple of options to choose from. You can design from scratch using simple shapes and fonts that are installed, or you can choose to import a file such as an .SVG or .Ai from another software like Inkscape or Adobe Illustrator. I choose to do all my design work in Adobe and then bring it into LightBurn for final edits and touches.
The project samples I am showing you in this post are available for download from the OMTech website, so you can follow along with this if you so choose.
IMPORTING A DESIGN TO LASER ENGRAVE
To import a design into LightBurn that you downloaded or saved from another program, simply go to File and then click Import, like the graphic shows below.
It comes with some basic instructions on how to use the file, so let me give a quick rundown of what each element means. Please note if you purchase laser engraving files or download design files from other creators, everyone designs their files differently. Some may come with instructions, while others may not.
Editable tags are simply the plain elements I made that can be used for your own custom designs. You can add your own words, graphics, or photos—whatever you choose and prefer to do.
Ready-to-go tags already have some basic words merged together, so these are pretty much ready to be laser cut. This shows a visual of how the designs are also layered on top of each other.
Lastly, the layer breakdowns show how the layers should be separated when cut. When I work, I usually try to avoid as much waste as possible, so I tend to nest things as close together as I can (see other photos for reference).
Please also note that while these are intended to be two-layered designs cut out of wood, you can also set them to engrave or outline the text for placement, if you so choose.
There are three ways we can go about setting up the file(s). Let me explain.
HOW TO LASER ENGRAVE A SIMPLE OUTLINE
A simple outline will just go over the outline of the top layer. In order to do this and not cut through your material, your “line” and power settings need to be very low. One benefit is that it can help with exact layer placement on top, especially if you have a lot of pieces. Below is an example of how the file looks and the outcome. It is harder to see on the darker woods, but you can still get an idea of where the outline is for placement purposes.
How long does it take to laser engrave the outline VS an actual engrave? The below design took roughly 37 seconds to outline and cut, while the engrave and cut took about 4 minutes.
HOW TO LASER ENGRAVE A CUT-OUT
These are just two separate layers that are done with two different materials. The layers need to be set to line, and both need to be cut.
HOW TO LASER ENGRAVE A SIMPLE ENGRAVE
This is a one-layer “Fill” (meaning engrave) and then a “Line,” which would cut the outline and the hole out. You might wonder how long it takes to laser engrave VS how long it takes to laser cut. While that is dependent on your machine, on my 60W it took roughly 4 minutes to engrave VS 2 minutes to cut.
A rundown for all the times:
Simple outline and cut: 37 seconds
Layered cut out: 2 minutes
Engraved and cut: 4 minutes
LOADING UP YOUR MATERIAL AND LASER CUTTING
Before you turn your machine on, turn your water cooling system on first and let it run for a minute or two. Then turn your machine on and let it start up.
Load up one material first and make sure to use some heavy magnets to hold it down to prevent any movement and warp. You also should check your focal height and adjust the bed to the proper distance, if needed.
Start with the 5/32 Walnut, and the design is nested like the below graphic.
Now that your material is loaded, go back to your computer and click Frame in LightBurn. This will show the location of where the designs will be cut. If the designs are not in the right location, you can simply move the elements and then click “Frame” again.
You want to make sure you have the correct laser settings based on your machine and the style you are going for. I just go over to my library area and select the material type I am using.
Once you are happy with your placement and you have your layers set correctly, you can send the job to your laser. The reason I chose to send the job VS clicking start in LightBurn is that I have had issues with the USB cable disconnecting halfway through, causing my laser to cut strangely. Perhaps this is only a Mac issue, but I choose to do this as a precaution to prevent any waste of materials.
From the Ruida controller, you can select your file and then start the job!
For the top layer, follow the same process as above. I move my graphics that are not in use off to the side and just move the correct graphics to the area I plan on cutting. Simply load your material in your laser engraver, make sure that your top layer graphics are in the correct placement and area, then send the job to your machine!
ASSEMBLING THE PIECES
When you are finished cutting both layers on your co2 laser, now it is time to assemble! I had both sheets masked previously, so the first step would be to peel off the masking.
Once the masking is peeled for both layers, I then proceed to use super glue. I've had great luck with Starbond and Gorilla Gel glue. I simply add little dots to the outer layer, and then if it globs on too thick, I gently dab it against a paper towel before sticking together.
Then I stick it together, I lay a paper towel on top and then something a little bit heavy to make sure everything adheres correctly. In my case, I use a broken marble cutting board I have on hand.
I try to let it sit for a minimum of a half-hour — the longer, the better.
Once it is done drying, I remove the weight and add the twine/ ribbon.
Contact White Dog Engraving
To speak with our team about your engraving project, contact us today by calling (972) 848-7790 or click here
Should you engrave your Apple devices?
Apple lets you engrave a combination of numbers, letters, or symbols. For AirPods lovers, Apple even allows users to engrave cases with emojis.
There are 30 emojis available for engraving. These include a fist bump, robot, alien, unicorn, all the zodiac animals, and even the poop emoji. In comparison to regular characters, emojis are engraved in a larger font.
The number of characters you can engrave varies for each Apple device. For iPads, Apple lets users add up to 34 characters per line. The second-generation Apple Pencils can only be engraved with up to 15 characters.
Whether it’s writing a nickname or a funny quote, showing a little personality with an engraving is a great way to differentiate yourself.
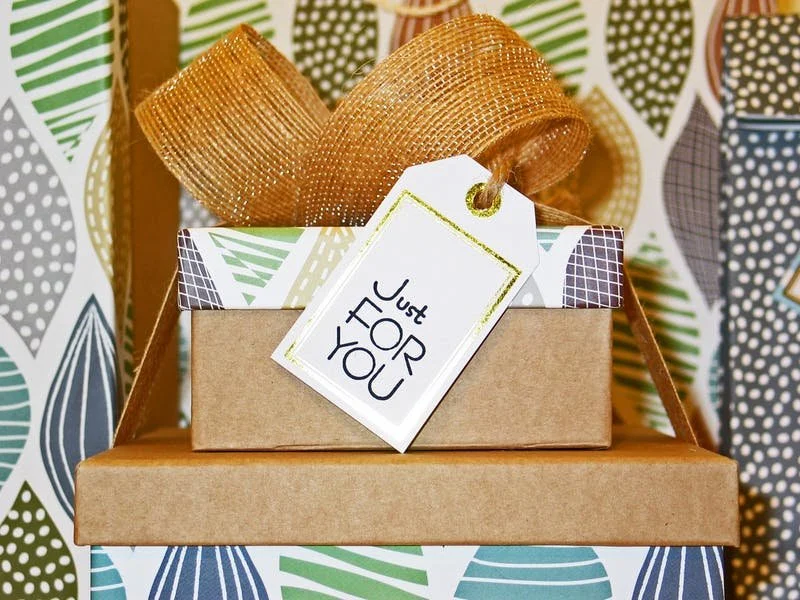
Gifting
Sometimes, you need to remind people why they should thankful to have you around. Gifting an engraved Apple device is one way to make sure that they always remember you.
For many generous gift givers, remarkable moments can only be made better with a customized engraving.
Avoid Mixing Up Devices
When it comes to Apple-loving households or offices, mix-ups for small things like AirPods or Apple Pencils happen a lot. In fact, if you haven't customized your cases, there’s a chance that you may not be able to tell which device is yours.
Contact White Dog Engraving
Ready to start your engraving project? Contact us today by calling (972) 848-7790 or click here to connect with us online.
Advances in cutting with ultrahigh-power fiber lasers
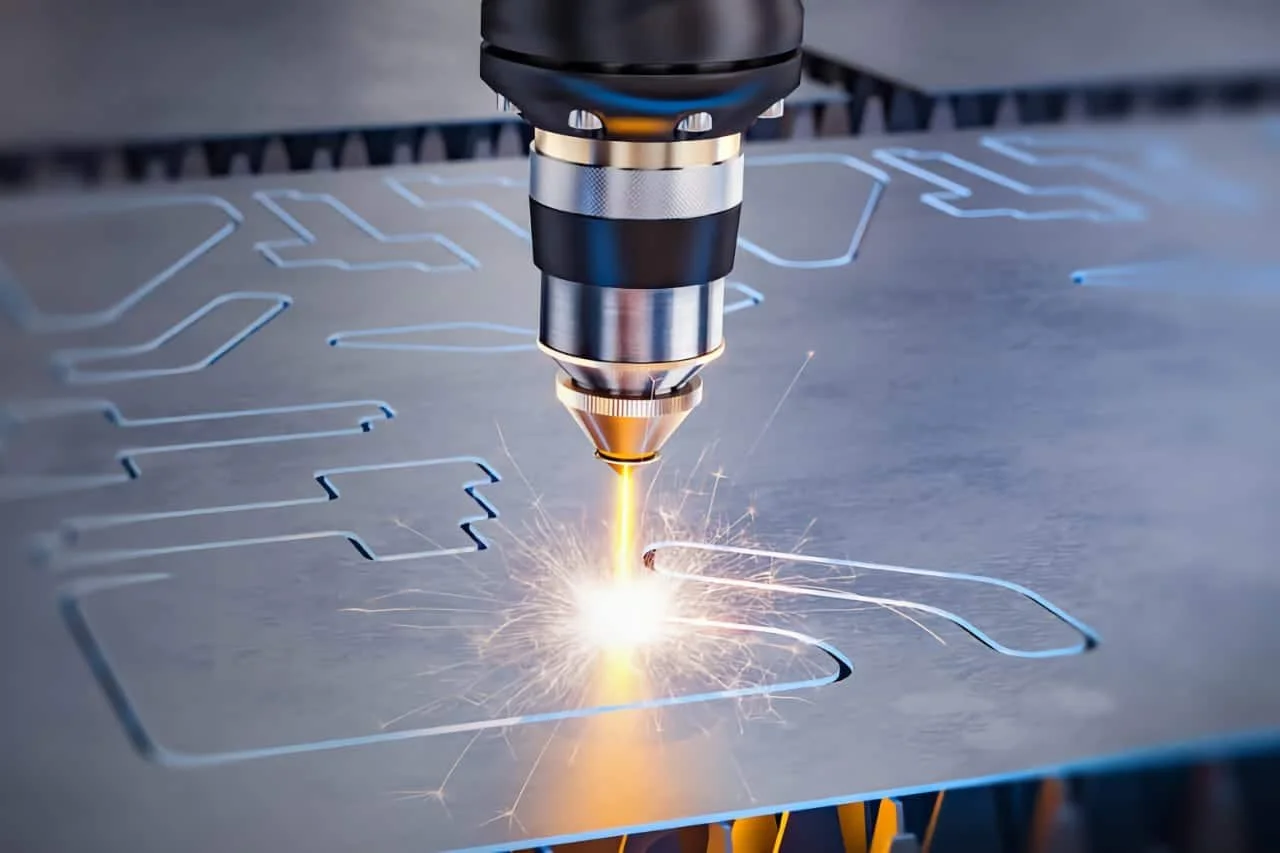
Ultrahigh-power (UHP) fiber lasers in the range of 10 to 40 kW have seen rapid adoption for cutting during the past few years, and the maximum laser power used for cutting is expected to continue to climb. We present cutting application results within this range and discuss the main factors driving the use of UHP fiber lasers, namely their remarkable productivity advantages, cut quality gains, and increased thickness capability (e.g., 230-mm-thick steel cutting shown in this article at 40 kW).
UHP lasers are defined here as greater than 10 kW of power, and they enable new process regimes to facilitate the expansion of laser cutting into new markets (e.g., by cutting up to 50 mm steels 4x faster than high-power plasma using air-assist gas). Application results show UHP lasers are changing the way steel is cut by replacing nitrogen and oxygen cutting processes with the air-assist process for high-quality and high-speed economical cutting.
Laser cutting has been marked by periods of intense technological advancements since its inception about 50 years ago, namely the introduction of commercial laser cutting machine tools in the 1970s and their use in mass production by early adopters. This was followed by the expanded adoption of carbon dioxide (CO2) laser cutting systems in 1980s, and the introduction of high-power fiber lasers in the late 1990s and early 2000s. During the late 2000s, the development of kilowatt-level fiber laser cutting tools enabled laser cutting to migrate away from specialized niche applications to become a mainstream fabrication process. Fiber laser cutters dominated the market for laser cutting of sheet metals, mainly due to their ease of integration, reliability, low maintenance, relatively low capital and running costs, high cutting throughput, and the feasibility of scaling their power.
In the late 2010s and early 2020s, the path for market growth of laser cutting took two directions. One trend is across the low-power end of the market, with surging demand for 1–3 kW cutters, driven by a lowered equipment capital cost. The second trend is in the high-power end of the market, which has also seen increasing demand for UHP lasers. This is being driven by their high productivity and technological capabilities offered at an economical price, and the laser cutting field has experienced a remarkable power transformation that is unparalleled among other sheet metal manufacturing processes during the same period. Maximum laser power offered on cutting machine tools at fabrication tradeshows has risen from 6 kW in 2015 to an expected 40 kW in 2022, a nearly 7X increase (see Fig. 1 at top of this page). In the last three years alone, the available system power has climbed from 15 kW to 40 kW—a 2.5X surge.
Why now?
Reliable high-power fiber lasers were available several years before the UHP cutting trend started, with 100 kW industrial fiber lasers available as early as 2013.1 But it was only after the rapidly declining price per kilowatt of lasers within the past few years that the barrier to entry into UHP laser cutting was reduced. Cutting heads to reliably handle such high optical power levels within the harsh cutting environment also became available, as well as cutting libraries for UHP cutting systems.
Test setup
For the tests presented here, IPG YLS-40000 40 kW and IPG YLS-30000-ECO2 30-kW high-wall-plug efficiency fiber lasers were used, set up with 100 µm fiber core diameter and the IPGCut-HP cutting head to assess the cutting speed and quality in different metals. To the extent of the authors’ knowledge, 40 kW laser power in 100 µm fiber core diameter is the highest level of laser source intensity ever used to date for industrial laser cutting. We selected a 100 µm fiber core diameter because of the additional 10–25% increase gained in cutting speed compared to 150 µm diameter.
Higher cutting speeds
Our experiments show laser cutting speed increases with increasing average power up to 40 kW for all metals tested, including stainless steel, carbon steel, and aluminum. Figure 2 shows the increase of cutting speed vs. laser power within the range of 12 to 40 kW, for 6–40 mm carbon steel with air-assist gas. The percentage gain in speed increases with increasing metal thickness. For example, a 280% increase in cutting speed for 12-mm-thick carbon steel from 15 to 40 kW (a 270% increase in power) is observed, while a 420% increase is observed for 20-mm-thick carbon steel. For 30 mm carbon steel, going from 30 to 40 kW (a 33% power increase) leads to 66% faster cuts. This suggests that UHP lasers with even higher power may lead to further productivity gains in thick cutting.
To harness the high cutting speed that UHP lasers provide to achieve a significant reduction in cycle time, it is important to cut parts at high accelerations, especially for thinner materials. In recent years, the acceleration limit on typical machines has shifted from 1 g to 3 g to cope with higher laser powers. On the high end, UHP laser cutters with accelerations as high as 6 g were introduced, along with mechanical designs to support such forces without significant path deviations.
Lowering cost per part for fast return on investment
UHP laser cutting (vs. lower power) significantly reduces the cost per part and leads to a fast return on investment and higher profitability. In laser cutting, a major contributor to the operating cost is gas consumption, and gas costs tend to increase significantly with part’s thickness.
UHP laser cutting requires the same or less gas pressure and nozzle size as lower-power cutting. But the cutting speed increases dramatically, which reduces the cutting time per part and substantially reduces gas consumption. For example, a 30 kW laser can cut a typical 16-mm-thick stainless steel part in half the cycle time compared to a 15 kW laser—cutting gas consumption in half.
The electricity consumption of the laser and chiller typically grows linearly with power. Despite that, the electricity consumption of the rest of the cutting machine tool remains about the same. Therefore, with half the cycle time per part in the previous example, we lower the overall electricity costs per part with increased laser power. With continuous developments, high-power fiber lasers’ energy efficiency exceeds 50% and further contributes to electricity savings.2
Factors other than faster cutting also contribute to gas savings with UHP lasers. UHP lasers allow for fast, dross-free cutting of thick carbon steel with high-pressure air, compared to the use of more expensive nitrogen or much slower oxygen cutting. In both nitrogen and air cutting, UHP allows for reduction of gas pressure needed for dross-free cuts. For example, for dross-free cuts in 20-mm-thick carbon steel at 15 kW, air pressure higher than 16 bar is needed, while 10–12 bar will be sufficient at 20 kW or higher. Since gas usage roughly varies linearly with pressure (at the same nozzle size), significant pressure reduction contributes to gas savings and eases the specification of gas generation equipment.
A high-power laser cutting system with twice the productivity vs. lower power is not twice as expensive. This is because the cost per kilowatt decreases with increasing laser power. In addition, the higher laser cost is absorbed in the total machine tool cost, which can have a marginal increase vs. a lower power laser tool. Therefore, it is not surprising to see a UHP laser cutter with 2x productivity gained by higher laser power with only 30–40% higher capital cost.
With significantly higher productivity, one UHP system can replace multiple lower-power systems, requiring a proportionally smaller footprint, fewer operators, and fewer facility preparations. On the other hand, the reliability requirements for UHP fiber laser sources and cutting heads are higher to maintain productivity. Namely, for the fiber laser source, stable power output and beam quality over the long term is required, driven by the quality of diodes, components, and optical integration. As for the UHP cutting head, it should handle high optical power, high-pressure gas, dust, process heat, and high acceleration for reliable operation.
New process options for cutting steel
Carbon steels can be cut with oxygen, nitrogen, or air-assist gas. Figure 3 summarizes the pros and cons of using each assist gas. While oxygen cutting excels at cutting thick carbon steel with lower laser power due to additional oxidation energy, it can become a productivity hindrance, because its speed does not scale well with laser power. On the contrary, air cutting of carbon steel scales well with power (see Fig. 2). For example, for 16-mm carbon steel, oxygen cutting speed remains flat from 10 to 30 kW, around 2 m/min, while the air cutting speed at 30 kW rises to higher than 9 m/min, which is 4.5x faster than with oxygen.
Thicknesses exclusively cut with oxygen at lower power and lower speed can now be processed several times faster and with good quality using UHP lasers and air. For low-power lasers, air cutting results in hard-to-remove dross and an undesirable surface quality. Development of this new high-productivity UHP fabrication option has been enthusiastically accepted by industries that heavily rely on thick steels, such as manufacturing construction equipment and heavy industry applications.
Contact White Dog Engraving
For engraving in the DFW area, contact White Dog Engraving today by calling (972) 848-7790 or click here to connect with us online.
Benefits of Using a Laser-Cutting and Engraving Service
Custom laser-cutting and engraving services are an excellent choice for businesses needing a range of cut-out or engraved products, from signage and displays to greeting cards. Lasers can cut and engrave many materials, including plastic, cardstock and paper, plywood, solid wood, wood veneer, and even fabrics.
Before the use of lasers, jobs that required cutting and engraving materials were done by hand. As a result, these jobs were challenging and often resulted in poor-quality products, inconsistent results, and extensive turnaround times. With lasers, however,customers enjoy a consistently high-quality product and a quick completion time. But what contributes to this level of quality and consistency, and why should your business go with a reputable laser cutting company such as Laser Cutting, Inc.?
1. Precision
Lasers used in laser-cutting and engraving are extremely accurate and can be adjusted to ensure the ideal cut or mark on a specific material. In fact, lasers are accurate to within one nanometer in both cutting and engraving. No other form of cutting and engraving is that precise—especially when the cutting and engraving is done by hand. In addition, the precision of a laser results in a reliably crisp and clean-looking product that sets your company apart and gives you an edge over the competition. Just imagine the professionalism and appeal a sleek laser-cut sign will add to your storefront, or the awe an intricately-cut textile display will inspire in your customers.
2. Cost-Efficiency
Having
your new acrylic signage, paper invitation cards, or custom wooden mural cut
and engraved with lasers is far more cost-effective than having these services
done by hand. You’ll not only receive a meticulously crafted product at a
better value, but also enjoy a shorter turnaround time. This quick production
time cuts down on cost.
In addition, laser-cutting and engraving is a cost-efficient alternative to other manufacturing methods for small businesses, schools, and even crafters. Crafters, for example, utilize laser-cutting and engraving for custom cards, mosaics, and woodworking. Schools may use these services to produce custom murals, mylar stencils for lettering, logos, and signage. More and more small businesses are using laser-cutting and engraving to manufacture anything from a single item to a large-volume order.
3. Shorter Turnaround
As stated before, laser-cutting companies offer a shorter turnaround time than conventional cutting and engraving services. This stems from the fact that lasers cut through materials more quickly and accurately than other cutting methods, including routers, milling machines, and mechanical cutting processes. Due to computer programming and automation, laser-cutting is also highly customizable. This means that the process isn’t just fast—it’s also highly precise, even for extremely complex designs.
Contact Us
At White Dog Engraving, we provide engraving services for the DFW area. To learn more about the services we can offer you, contact us today by clicking here.

Laser Engraving Leather Debossing Stamps with MDF and Acrylic
Laser Engraving Leather Debossing Stamps with MDF and Acrylic
Since we’ve engraved away a lot of material to achieve our desired depth, our stamps are quite dirty. We’ll take these back to our sink and scrub away that residue.
We recommend limiting your MDF stamp’s exposure to water while cleaning. MDF is absorbent and significant amounts of water can cause it to break down. Our stamp was exposed to water only briefly and it has held up very well, but your mileage may vary. To be safe, you can opt to clean your MDF stamp with a dry or damp brush.
Once we’re done, we’ll also peel off our protective masking.
Soaking our Patches
The last bit of prep involves soaking our leather patches. This may not be necessary for every material, but with these patches we found soaking them in water prior to debossing made them much more pliable and more receptive to the stamping process. This didn’t take long though; we soaked our patches for around a minute.
Debossing
Now it’s time to put our stamps to the test.
In order to get a nice, deep impression, we’ll need to press the stamp into the leather very firmly. We’ll use several clamps to accomplish this, but a vice would also work very well. We’ll use a couple of wood blocks to protect our materials from the clamps and to evenly disperse the pressure.
We’ll apply this pressure for a brief but sustained period of time (several minutes or so should do the trick), then we’ll release the clamps and see our results.
As you can see, both the MDF and the acrylic provided excellent results with these patches. Both materials gave us a great quality mark, so feel free to experiment with the materials you use. Acrylic is a more expensive option, but using clear acrylic meant we could see through the graphics on our stamp, making it even easier to align our images with confidence. You could try using wood or Delrin, or even metal if you’re using a fiber laser.
We applied some leather conditioner to our debossed patches to help finish them off and provide a bit more contrast. If you’re working with raw leather, you could also consider using some leather dye. Really, the sky’s the limit; let your creativity shine.
Contact White Dog Engraving
To learn more about the engraving services we can offer you, contact us today by calling (972) 848-7790 or click here to connect with us online.
The Best Solution for Laser Engraving Polyethylene
Searching for a laser engraving machine that will work with polyethylene? Look no further than the laser engraving systems from TYKMA Electrox. Below, we’ll look at specifics for polyethylene along with our recommended system for marking it, the Vereo UV Integration Laser.
About Polyethylene
Laser systems from TYKMA Electrox are capable of engraving various materials and substrates, including polyethylene. Polyethylene is the most common plastic in the world and is extremely versatile. It can be found in all of the following and much more:
Plastic grocery bags
Injection moldings
Shampoo bottles
Bulletproof vests
Medicine jars
Children’s toys
Water bottles
Wire insulation
Peanut butter jars
Drainpipes
Plastic containers
Tubing
Gasoline containers and tanks
Coatings and laminations
Fishing and sports nets
Telecommunication cables
While polyethylene has various applications, it is most commonly used in industrial, marine, municipal, mining, duct, landfill, and agricultural applications. Some features of polyethylene that makes it such a versatile and valuable material for companies are as follows:
Light weight
Tough
Good moisture resistance
High chemical resistance
Low coefficient of friction
Easy to process
Good corrosion resistance
Polyethylene is available in several grades and formulations but is classified into five main categories according to its density. These five main categories of polyethylene are as follows:
Low density
Linear low density
High density
Ultra-high-molecular-weight
Cross-linked
Additionally, polyethylene can vary between being transparent, translucent, and opaque depending on its thermal history and thickness.
The Vereo UV Integration Laser
As a leading provider of laser marking systems, TYKMA Electrox offers a number of laser engraving machines. However, some machines are better for engraving specific materials than others.
In particular, we recommend our Vereo UV Integration Laser for marking polyethylene, as UV lasers are more suited for this material than fiber lasers.
Our Vereo UV Integration Laser is a highly efficient system that is air-cooled and maintenance-free, while featuring low energy consumption.
Some of the system’s diverse applications include:
Marking polyethylene
Marking silicon
Black annealing on medical devices
Glass scribing
Be sure to visit our Vereo UV Integration Laser page linked above for full product specs.
The Benefits of Laser Engraving Polyethylene
Some of the benefits of laser marking polyethylene include:
Polyethylene withstands extreme UV exposure and substantial salt spray testing
High contrast marking is possible on any color of polyethylene
Laser marks on polyethylene are clear, distinct and precise
Additionally, we accept materials for application testing and evaluation. Reach out to us today to see the effects of laser marking polyethylene, free of charge!
More Laser Marking Systems from TYKMA Electrox
With the laser marking systems from TYKMA Electrox, laser engraving has never been easier. Whether you need to engrave a logo, 2D code, barcode, or identification number, a laser engraving system from TYKMA Electrox has got you covered.
All TYKMA Electrox laser engraving systems are equipped with the following:
Top-of-the-line laser engines with an extensive lifespan
Energy-efficient operations and advanced capabilities for etching, marking, and engraving
Air-cooled, ergonomic designs
User-friendly controls and cutting-edge features
Additionally all of our laser marking machines are shipped fully assembled and require no calibrations. Backed with the best warranty in the industry, our laser marking systems are used in a wide variety of industries.
More
Contact White Dog Engraving
At White Dog Engraving, we specialize in engraving services for the DFW area.
To learn more about the services we can offer you, contact us today by clicking here.
Unique Wedding Gift Ideas For The Couple Who Has Everything
At this point in your life, you've probably purchased and received a countless amount of gifts. From Mother's Day to Valentine's Day and all the birthdays, baby showers, and housewarming parties in between, it seems like our world is constantly finding ways to celebrate one another. As much as that is tons of fun, there's also a lot of pressure to show how much you love someone through a physical item—especially when it comes to figuring out a wedding gift idea to get *that* couple in your life who seems to have it all.
What is the best gift for a wedding?
Figuring out how to please a set of two separate humans while celebrating their love and upcoming marriage can be difficult, which is precisely why I called in wedding planner and event manager Chanakya Gandhi, who's seen at least thousands of wedding gifts throughout the years. First things first? "Put yourself in the newlywed couple’s shoes," he says. "Make sure you would actually want the gift you're getting them."
Peep a few of the best wedding gift ideas, below:
Gift Card
Date Night Cookbook and Activities for Couples
Waterproof 4k Digital Camera with Touch Screen
Hand Casting Kit
Push Pin World Map Board
Multi-Photo Frame Wood Tray
Yellow Label Champagne Gift Box
Pre-Seasoned Cast Iron Reversible Grill/Griddle
Engraved items
Contact White Dog Engraving
To learn more about our DFW Engraving services, contact us today by calling (972) 848-7790 or click here.

Unique Engraved Gifts for a Personalized Touch
Searching for unique engraved gift ideas? Click here!
Everyday items such as dog bowls, clocks, or silverware can take on new meaning when you engrave them with something personal, like a monogram or phrase that’s significant to you and the gift’s recipient.
An engraved gift shows that you went the extra mile to make the item more personal, and it can be especially meaningful when given as a wedding or anniversary present.
Regardless of the occasion or the recipient, a wide range of objects can be engraved, which likely makes selecting a gift less challenging. If the options are still overwhelming to you, this guide breaks down top-rated items by price point, so shopping can be less tedious and more fun.
How to Choose the Best Engraved Gifts
Before you begin the adventure of finding the perfect engraved gift, it can be helpful to consider a few questions about the recipient. This way, you can narrow down the selection to the perfect few. Ask yourself:
What hobbies or activities does the person I’m shopping for enjoy? If they’re a frequent entertainer or love to cook, personalized items in those categories will make the most sense.
What everyday items do they need that can be made more personal? From keychains to phone chargers to cutting boards, a custom engraving or monogram can add that special touch to a simple object.
What is your budget? We’ve broken down gift suggestions by price range, so it’s easy to figure out which gifts best suit your predetermined price range.
The Best Engraved Gifts
Peanut Butter Spoon
From elegant serving platters to dog bowls to Christmas ornaments, these engraved gifts add a personal touch that makes each one more memorable.
The next time your best friend or family member picks up a spoon to dig into their morning bowl of cereal or yogurt, this personalized Peanut Butter Spoon can remind them of you or an inside joke you share. Hand-stamped with the phrase or wording of your choice, this standard stainless steel spoon adds meaning to everyday meals or snacks. You can say “Hello Handsome,” or “I love you, Mom,” in a unique way with this spoon, which is available as a teaspoon or tablespoon. The words are stamped into the metal, and the ink used to stamp the lettering is food-safe.
Personalized Key Chain
For a new driver or someone you love, this Personalized Bar Key Chain is a great way to remind them to stay safe on the road or send them off with a sentimental note. Available in silver, gold, or rose gold, the keychain can be engraved on one or both sides with a message, signature, or even a fingerprint to let your gift recipient know you care. Each item is made to order, so it will be unique.
Engraved Ornament
Help new parents celebrate their little one’s first Christmas with the Precious Moments Premium Engraved Ornament. The ornament is a beautiful memento that can be skillfully etched with the year, the name of the baby, and an additional line of text on a bevel-cut glass ornament. An elegant ribbon adds a finishing touch to hang on any style tree, and it comes in a velvet drawstring bag to ensure it stays in pristine condition year after year.
Contact White Dog Engraving
To learn more about our Dallas Texas engraving service, contact us today by calling (972) 848-7790 or click here.
How Does Laser Engraving Work?
Laser etching, laser marking, and laser engraving are all applications that can be satisfied by an industrial laser cutting machine.
Are you thinking about hiring an engraver but you don’t know how laser engraving works?
In this article, we will offer you several tips on how the laser engraving process works.
Understanding Laser Engraving
Laser etching, laser marking, and laser engraving are all applications that can be satisfied by an industrial laser cutting machine. Laser machines vary significantly in their function and properties: there are CO2 laser engraving machines which primarily emit low-powered laser beams and could fit comfortably on your desk, and there are also high-powered fiber lasers that have been purposefully designed to facilitate high-volume laser marking and engraving applications in an industrial setting. Different lasers vary based on the specific chemistry that they use to create the laser beam.
In general, all laser cutting machines have three common components: the laser itself, the control system for the laser, and the marking surface. The operator of the machine uses a software program to modify settings on the laser cutter, including the power output of the laser and the speed of the controller that directs the laser across the material surface.
These settings can be used to change the laser cutter application from laser engraving to laser etching or marking. An image chosen for engraving onto a given material must be produced with graphics editing software.
These include well-known applications such as Adobe Illustrator, Inkscape, and Adobe Photoshop, and AutoCAD that can produce vector files. Vector files have a special property that makes them ideal for the laser marking application: the images in vector files maintain their clarity and proportions when adjusted to any size.
A saved vector file containing the desired image can be uploaded into the laser cutter software and translated into numerical data. The laser cutter’s own software can take that data and use it to program the laser machine’s controller apparatus to produce the provided image using the laser. Conceptually, you might think about laser engraving machines as being similar to 3D printers.
They both use digital designs to automate a creative process, but while a 3D printer functions by printing plastic blocks in the programmed pattern, the laser machine uses a programmed pattern to take something away from the material–leaving engraved text or a lasting image in its place.
Contact White Dog Engraving
At White Dog Engraving, we specialize in engraving services for the Dallas Texas area.
To learn more about our services, contact us today by calling (972) 848-7790 or click here!
Father’s Day 2022 Gift Ideas
Are you searching for Father’s Day gift ideas? If so, you’ve come to the right place!
Fathers-Day is coming up quickly! Thankfully, you can get prepared for Dad’s big day by giving him one of these great gifts.
Gold Electric Toothbrush From Moon
If you think your dad is the king of your family, then he deserves a gift fit for a king, and what would be more kingly than a gold electric toothbrush and toothpaste like this collection from MOON. Combining innovative technology with better-for-you ingredients, the collection includes MOON’s best-selling Electric Toothbrush in a luxe gold colorway and the brand new 24K Gold Gel Toothpaste with a signature Cinnamint flavor. The ergonomic Electric Toothbrush ($69.99 as is or $59.99 with brush head subscription) has 5 sonic cleaning modes for targeted results, premium ultra-fine bristles for optimal reach, and holds an industry-leading 6-week charge. The gentle, fluoride-free 24k Gold Gel Toothpaste ($12.99) polishes and whitens teeth with 24K gold mica flakes that sparkle on your toothbrush.
Nomad x Orbitkey key organizer
If your dad still carries old-school keys on a boring jangly key ring, then he’ll love the Nomad x Orbitkey key organizer. This collaboration between Nomad and Orbitkey elevates Orbitkey’s popular key organizer with a Horween leather strap from Nomad.
Made from vegetable-tanned Horween Leather from the USA and designed with a custom stainless-steel D-ring, this key organizer is designed to carry 2-7 traditional keys in a silent stack for better pocket carry. It has that wonderful new leather smell and looks great.
WESN Father’s Day Gift Boxes
If your dad is into EDC, then you can’t go wrong by getting him a Father’s Day Gift Box from WESN. All boxes are built around one of WESN’s popular knives like the MicroBlade, Allman, Henry, or Samla and also include a bunch of other great gear for keeping the blade sharp. Everything is boxed up and ready to hand to Dad. They are currently selling their Father’s Day gift boxes for 25% off, so it’s a great deal for both you and Dad.
Contact White Dog Engraving
To get your Father’s Day 2022 gifts engraved, contact us today by calling (972) 848-7790 or click here.

Fort Worth Engraving – Contact White Dog Engraving Today!
Are you searching for Forth Worth Engraving? If so, contact White Dog Engraving today by calling us at (972) 848-7790 or connect with us online.
Are you searching for Forth Worth Engraving? If so, contact White Dog Engraving today by calling us at (972) 848-7790 or connect with us online.
We specialize in laser engraving services and can offer you fast service for your engraving needs, especially if you need awards, plaques, badges or glass engraved for your business.
Your Fort Worth Engraving Service
Finding an engraver that you can trust is difficult; thanks to White Dog Engraving, you finally have an engraver that can have confidence in knowing that the job will be done right.
Besides offering excellent service, our company also offers fast turnaround time as well so it doesn’t matter if you need something engraved fast, you can rely on us for all of your DFW engraving needs.
Common Engraving Questions
How much do you charge to engrave something?
There is no set price since all job requests are different. You can request for a quote by contacting us at 972-848-7790.
Do you have discounts for bulk order?
Yes, we do! Our laser service is at a lower rate for larger jobs. Please discuss with your salesman to learn more.
Can I bring my own material instead of using yours?
Absolutely yes! Let us know what material you plan to use and we can advise from there. If we can work with your material, you can ship your material to us or drop them off for your order.
Can you laser engrave cylindrical object such as water bottle?
Yes, we can. We use a rotary device to turn the object while engraving.
What kind of items can you primarily engrave on?
We are able to engrave on a variety of items that include, but not limited to: wood, acrylic, fabric, glass, coated metals, ceramic, deleon, cloth, leather, marble, matte board, melamine, mother of pearl, paper, mylar, pressboard, runner, wood veneer, fiberglass, painted metals, tile, plastic, cork, coriander, anodized aluminum, stainless steel, brass, titanium, bare metals and more.
Contact White Dog Engraving
To learn more about our Fort Worth Engraving service, contact us today by calling (972) 848-7790 or click here to connect with us online.

3 Gorgeous Engraving Techniques You’d Absolutely Love
1. CNC Rotary engraving
CNC Rotary engraving is very similar to the traditional – ancient hand carving technique. This milling machine, with only one difference from the traditional carving, is ideal for highly detailed engravings.
The Rotary machine is designed to produce ideal copies of a piece with its rich details, in well-polished, precise and short-term manner.CNC (computer numerical control) miller has a 3-axis tool, which follows and interprets certain path (lines) pre-drawn in a CAD software by the designer.
G code – is the language which tells the rotary machine to cut through the material or cut (engrave) to a certain depth. It also reads inside the line, outside the line and on the line cutting commands.3 axis
X axes – runs from left to right
Y axes – runs from top to bottom
Z axes – is the zero point and the process
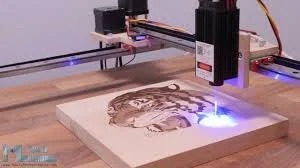
2. CNC Laser engraving
The laser engraving sends laser pulses to make incisions – burns or cuts host of materials.
The laser head runs back and forth to produce clear cut and very detailed engravings.
The materials that work wonders for laser engraving are Acrylic, wood, Lexan, etc.
Depending on the final effect, we can control the direction, speed, depth and the size of the detailed engravings on different surface properties.
This computerized machine must have illustrator files for the laser to cut at a certain thickness and certain lines.
Different laser machines offer variety of depths to personalize and customize the suitable material. For example, dense materials can handle up to 0.020 deep engravings.
3. 3D engraving
At a touch of a button, CNC milling can create 3D signs. The Milling machine can engrave graphics, ornaments to a fine piece of artwork.
3D design process is practiced on materials such as Wood(of course), Acrylic and even metal.
The multi-spindle router creates squiggly, curved lines with a batch of extensive CNC tools which highly resembles manual carving – but done at less time and reduced manpower.
But there’s more than that.
Techniques
3d engraving on the CNC routers is similar to bright-cut engraving with V-point engraving tools. The G-code language (the encrypted dialect of the CNC routers) interprets the vectors and raster images from the results obtained by the software. The V-point can vary to 360 degrees. The tools mimic the cutting and texturing motion of hand tools such as roulets and burnishers (Source: Wikipedia — engraving) by removing the material as the piece rotates on the 360 degrees rotary.
More
Contact White Dog Engraving
For more information about our engraving services, contact us today by calling (972) 848-7790 or click here to connect with us online.

The Best 19th Anniversary Gift Ideas for Your Spouse or the Happy Couple
Looking for a great idea for a 19th wedding anniversary gift? Whether you want something traditional, modern, or unique, we've got you covered with these stylish picks!
Looking for a great idea for a 19th wedding anniversary gift? Whether you want something traditional, modern, or unique, we've got you covered with these stylish picks!
We have included third-party products to help you navigate and enjoy life’s biggest moments. Purchases made through links on this page may earn us a commission.
Celebrating a 19th wedding anniversary is a major marital milestone. You've done nearly two decades together, and it's certainly worth paying homage to all those years of marriage with a great gift. Whether you want to surprise your sweetie with something sentimental or congratulate a special couple in your life, there are anniversary gift ideas galore worthy of celebrating 19 years of wedded bliss. Okay, it's probably been more like 19 years of highs, lows, and everything in between, but whatever the case, gifts are most certainly in order. To help you narrow down your options, we've scoured the internet for a host of awesome ideas, from sweet and sentimental traditional gifts like jewelry to more modern and quirky picks.
What is the traditional 19th anniversary?
The 19th wedding anniversary gift themes are all about bronze. Known for its durability, bronze is a great representation of a marriage that has endured for 19 years. Not only are both the traditional and modern themes bronze, but it's the anniversary's official color too. As for the 19th-anniversary flower, well, there isn't any official one—however, many people tend to go with bronze-colored flowers like the bronze chrysanthemum. And while bronze may be used for third-place medals, there are plenty of great bronze anniversary gifts that will take first place in their hearts.
Want to go beyond the milestone's traditional material? No problem. The 19th wedding anniversary gemstone is the vibrant aquamarine. That being said, no rule says you have to stick with the themes at all. When you've been married for 19 years, almost anything goes, so we've rounded up some great alternative gifts as well.
The Best 19th Anniversary Gifts
As you can see, there's plenty of inspiration to be had when it comes to honoring 19 years of marriage. Here, we've narrowed it down to some of the best traditional, modern, and alternative 19th-anniversary gift ideas to help you say "I love you," "Thanks for sticking with me," or "Congratulations."
1. Sentimental strand
Could there be a more perfect 19th wedding anniversary gift than this "We Are One" necklace? We think not. Not only is made of—you guessed it—bronze, but it features two interlocking rings to "symbolize the strength of love." (Awwh!)
2. Unique whiskey glasses
Raise a glass to the 19th year of marriage with these gorgeous handmade bronze pottery whiskey glasses. Each one holds about seven ounces of their favorite beverage—bonus points if you gift it with a bottle, too. There's also the option of having the tumbler personalized with the number 19 in honor of your milestone.
3. Cool cufflinks
Take inspiration from the 19th-anniversary gemstone with these dapper aquamarine jade cufflinks. Set in sterling silver, they'll add a fancy flair to your spouse's shirtsleeves.
Get Those Gifts Engraved With By White Dog Engraving
At White Dog Engraving, we offer fast and convenient engraving services.
You can count on us to complete your project on time and personalize your gift so that it's the most memorable gift that your spouse will receive from you.
To learn more about our services, contact us today by calling (972) 848-7790 or click here to connect with us online.

Unique Bridesmaid Gift Ideas
Searching for unique bridesmaid gifts for your bridesmaids? If so, click here!
While giving your bridesmaid thank-you gifts isn't required, it never goes unappreciated. "Your bridesmaids are here to provide support throughout the entire wedding planning journey," says Kisha Damali, owner and creative director at D'MALI, a New York City-based design studio that specializes in gifting. "What better way to show how much you value their time and assistance during the most important milestone of your life than with a gift?" she continues. From pitching in for the bridal shower to organizing a bachelorette getaway and volunteering their time for bridesmaid dress fittings, it's safe to say your crew has earned some appreciation.
1. On-Theme Candles
Embrace the celebratory theme by choosing this "Let's Toast" candle with notes of grapefruit, apple, and champagne grapes as a gift for your bridesmaids on your wedding day. You can personalize the back of the glass jar with a sweet, personal note thanking them for being your besties. There's also the option to add Sugarfina champagne-flavored gummy bears or sugar lips for an extra-sweet present.
2. Travel Jewelry Cases
If your girls are always on the go, there are lots of useful bridesmaid gifts to complement their carry-ons. This gorgeous jewelry case is something they'll turn to on the regular. It's not just great for travel—they can safely stow their jewelry in the case all the time. With a luxurious leather finish, it'll look great on their dresser.
3. Sentimental Photo Books
You've shared so many wonderful memories. For the ultimate bridesmaid gift, make a photo book filled with favorite photos of your biggest adventures. Artifact Uprising's online editing tools make creating your memory book a breeze, and you can customize the cover with your preferred image and title. Trust us, this gift will be treasured forever.
4. Surprise Celebrity Greetings
Shopping for someone who already seems to have everything? Experiential gifts are your best bet. Cameo lets you request a personal video message from a celebrity. There are lots of famous faces on the platform, from pro athletes to actors, musicians, and reality stars. Believe us when we say it'll be a bridal party gift to remember. (Psst, Cameo is also a great way to coordinate memorable bridesmaid proposals.)
5. Portrait Champagne Flutes
Personalized bridesmaid gifts are always a good idea. It shows your 'maids that you went the extra mile to pick out something just for them, and if it's anywhere near as awesome as these flutes, it'll come in clutch for years to come. Your crew will never tire of sipping sweet champagne from a glass with their portrait painted on it.
Engrave Those Bridesmaid Gifts At White Dog Engraving
Instead of giving generic bridesmaid gifts, why not engrave them?
At White Dog Engraving, you can personalize those bridesmaid gifts so that your wedding will be something that your girls remember for years to come.
To learn more about our engraving services, contact us today by calling (972) 848-7790 or click here to connect with us online.

A Quick Guide to Laser Engraving
What is Laser Engraving? Laser engraving is a special type of laser marking that produces similar results when compared to traditional engraving methods, but without the use of inks or tool bits that contact the surface material. Laser engraving is best understood in contrast with its sister technologies–laser etching and laser marking. In laser marking, a low-powered laser beam is moved slowly across the target material. The beam slightly discolors the material, creating high-contrast, permanent markings without damaging or compromising the structural integrity of the material. Laser marking is often referred to as laser coloration or laser dark marking, nomenclature which emphasizes the fact that the material is unaffected by the application of the marking. Laser engraving uses a high-powered laser beam to vaporize the surface of the target material, leaving a cavity whose depth can range from one fiftieth to one eighth of an inch. Laser engraving works with a variety of materials, including plastic, wood, anodized aluminum, stainless steel, and glass surfaces. Laser engraving is especially useful for marking parts that are expected to experience high levels of wear throughout their useful life, as the deep penetration of the laser in the engraving process assures the permanence of markings. A third application, laser etching, takes place when a high-powered laser beam is used to melt the surface of the target material, causing it to expand and leaving a visible, raised mark on the material surface. Laser etching can be applied to a variety of surfaces and materials and typically removes less than one thousandth inch of the material surface.
Laser etching, laser marking, and laser engraving are all applications that can be satisfied by an industrial laser cutting machine. Laser machines vary significantly in their function and properties: there are CO2 laser engraving machines which primarily emit low-powered laser beams and could fit comfortably on your desk, and there are also high-powered fiber lasers that have been purposefully designed to facilitate high-volume laser marking and engraving applications in an industrial setting. Different lasers vary based on the specific chemistry that they use to create the laser beam. In general, all laser cutting machines have three common components: the laser itself, the control system for the laser, and the marking surface. The operator of the machine uses a software program to modify settings on the laser cutter, including the power output of the laser and the speed of the controller that directs the laser across the material surface. These settings can be used to change the laser cutter application from laser engraving to laser etching or marking. An image chosen for engraving onto a given material must be produced with graphics editing software. These include well-known applications such as Adobe Illustrator, Inkscape, and Adobe Photoshop, and AutoCAD that can produce vector files. Vector files have a special property that makes them ideal for the laser marking application: the images in vector files maintain their clarity and proportions when adjusted to any size. A saved vector file containing the desired image can be uploaded into the laser cutter software and translated into numerical data. The laser cutter’s own software can take that data and use it to program the laser machine’s controller apparatus to produce the provided image using the laser. Conceptually, you might think about laser engraving machines as being similar to 3D printers. They both use digital designs to automate a creative process, but while a 3D printer functions by printing plastic blocks in the programmed pattern, the laser machine uses a programmed pattern to take something away from the material–leaving engraved text or a lasting image in its place.
Laser Engraving for the Aerospace and Defense Industries Laser marking for aerospace parts represents an exciting new area of application for laser marking and engraving technologies. The aerial vehicles assembled by major contractors in these industries incorporate thousands of parts that travel through a complex global supply chain from their point of origin to the manufactured product, with numerous stops along the way. In order to promote quality and accountability throughout the supply chain, parts-makers in this sector are using laser engraving machines to mark products with barcodes and serial numbers that establishes their traceability. There are significant benefits for manufacturers that choose laser engraving over alternative marking methods for aerospace parts: Low Variable Costs – Chemical etching is a frequent substitute for laser engraving and entails the use of a strong acid to mark the material. Companies that use this method need adequate wastewater treatment or an appropriately certified third-party company to responsibly dispose of chemical waste, and each new image requires a brand new stencil to be produced. In contrast, laser engraving machines have zero inputs besides the power it takes to run them. This translates into low and predictable costs for manufacturers.
Contact White Dog Engraving
Need laser engraving? We can help you with all of your engraving needs!
To learn more about the engraving services we can offer you, contact us today by clicking here.

Metal Engraving Tools Explained: How To Choose And Prepare Gravers For Jewelry Work
Many industries have need of specialized engravers, for instance those who make dies, who cut stones and glass, and others who carve reliefs. Though a goldsmith might call on a specialist for certain jobs, it is useful to have a general understanding of the technique and sufficient skills to use gravers for simple everyday tasks at the bench.
How the Engraving Tool Works
Engraving tools are miniature chisels made of hardened steel. They are chip forming tools and subject to the same forces described in Chapter 5. In proper engraving a sharpened tool is set against the metal at a specific angle and pressure applied both downward and forward. The tool buries itself into the sheet, forms a chip, and pushes that curl of metal ahead of it as it cuts.
The angle of attack is important to achieve a controlled and uniform cut. If the angle is too steep the tool digs itself into the sheet making it impossible to push it forward. The effort to overpower a buried tool can result in a loss of control and a broken tip. If the angle is too shallow the point never gains purchase on the sheet. There is no chip formed and no cut made. Because the tip of the tool is not caught by the metal, the tool easily slips, creating a nasty scratch.
The proper angle will depend on the shape of the graver, the quality of the desired line and the metal being cut. Understanding and responding to these factors requires a sensitive touch and considerable experience.
Engraving Tool Shapes
Engraving tools, called gravers, are precise instruments. They must be made from top quality steel, shaped and sharpened to specific angles, and fitted into handles that provide comfort and control. Commercially available gravers are made from a highly refined fine grained tool steel. A high speed steel is to be recommended for working harder materials and to have the greatest possible durability; there are even engraving tools with carbide cutting tips.
Contact White Dog Engraving
For more engraving tips, or to speak with us about our engraving services, contact us today by clicking here.

Engraving Tips And Tricks
Whether you are an accomplished engineer or a novice maker, learning the proper uses of design equipment to avoid pitfalls and mistakes takes time and experience.
From time to time, issues come up that leave designers wondering what they did wrong or how they could do something better. This is true in any field and laser engraving is no different.
Knowing how to avoid these mistakes so they don’t come up again is half the battle. With that in mind, let's talk about five of the most common mistakes when it comes to laser engraving and ways to avoid them in future projects.
Mistake 1: Engraving Fabric but the Laser Burns through the Material
The first step in avoiding burning fabric with a laser engraving/cutting machine is to understand which fabrics can withstand the process and at what temperatures. Heartier fabrics such as denim, canvas and leather can withstand higher power settings during engraving. But when it comes to delicate fabrics, it is important to start your settings at high speed (near or at 100%) and low power (around 5% to 10%). Test these initial settings on some spare material, and if the fabric can withstand it, increase the power until you get the results you are looking for.
When it comes to direct-to-garment engraving, it is helpful to lower the dots per inch (DPI) at which you engrave. The higher the DPI, the more material will be removed. Engraving at a lower DPI helps ensure the laser just slightly vaporizes the top layer and doesn’t burn entirely through the fabric. Most fabric engravings do fine at 150 to 300 DPI.
5 Common Mistakes in Laser Engraving and How to Avoid Them
Take your engraving to the next level with these helpful tips.
February 2nd, 2018 by Amy Dallman
Whether you are an accomplished engineer or a novice maker, learning the proper uses of design equipment to avoid pitfalls and mistakes takes time and experience.
From time to time, issues come up that leave designers wondering what they did wrong or how they could do something better. This is true in any field and laser engraving is no different.
Knowing how to avoid these mistakes so they don’t come up again is half the battle. With that in mind, let's talk about five of the most common mistakes when it comes to laser engraving and ways to avoid them in future projects.
Mistake 1: Engraving Fabric but the Laser Burns through the Material
The first step in avoiding burning fabric with a laser engraving/cutting machine is to understand which fabrics can withstand the process and at what temperatures. Heartier fabrics such as denim, canvas and leather can withstand higher power settings during engraving. But when it comes to delicate fabrics, it is important to start your settings at high speed (near or at 100%) and low power (around 5% to 10%). Test these initial settings on some spare material, and if the fabric can withstand it, increase the power until you get the results you are looking for.
When it comes to direct-to-garment engraving, it is helpful to lower the dots per inch (DPI) at which you engrave. The higher the DPI, the more material will be removed. Engraving at a lower DPI helps ensure the laser just slightly vaporizes the top layer and doesn’t burn entirely through the fabric. Most fabric engravings do fine at 150 to 300 DPI.
Mistake 2: Acrylic Doesn’t Produce a Frosty White Engraving
More than likely, this is caused by using the wrong acrylic in the application. Two types of acrylics are typically used in laser engraving and both are suitable for different applications.
Cast acrylic sheets and objects are made from a liquid acrylic that is poured into molds that can then be set into various shapes and sizes. This type of acrylic is ideal for engraving because it turns a frosty white color when engraved, making it suitable for awards and plaques. It can be cut with a laser, but it won’t give projects flame-polished edges.
The other type of acrylic used in laser engraving is called extruded acrylic, which is formed into sheets by a machine. Extruded acrylic is generally less expensive than cast acrylic because it is formed through a higher-volume manufacturing technique. However, it does react very differently with the laser engraving machine. This type of acrylic cuts cleanly and smoothly and produces a flame-polished edge; however, when engraved, it doesn’t produce that frosted look, but rather a clear engraving. So make sure you are using cast acrylic if you want a frosted white finish.5 Common Mistakes in Laser Engraving and How to Avoid Them
Take your engraving to the next level with these helpful tips.
February 2nd, 2018 by Amy Dallman
Whether you are an accomplished engineer or a novice maker, learning the proper uses of design equipment to avoid pitfalls and mistakes takes time and experience.
From time to time, issues come up that leave designers wondering what they did wrong or how they could do something better. This is true in any field and laser engraving is no different.
Knowing how to avoid these mistakes so they don’t come up again is half the battle. With that in mind, let's talk about five of the most common mistakes when it comes to laser engraving and ways to avoid them in future projects.
Mistake 1: Engraving Fabric but the Laser Burns through the Material
The first step in avoiding burning fabric with a laser engraving/cutting machine is to understand which fabrics can withstand the process and at what temperatures. Heartier fabrics such as denim, canvas and leather can withstand higher power settings during engraving. But when it comes to delicate fabrics, it is important to start your settings at high speed (near or at 100%) and low power (around 5% to 10%). Test these initial settings on some spare material, and if the fabric can withstand it, increase the power until you get the results you are looking for.
When it comes to direct-to-garment engraving, it is helpful to lower the dots per inch (DPI) at which you engrave. The higher the DPI, the more material will be removed. Engraving at a lower DPI helps ensure the laser just slightly vaporizes the top layer and doesn’t burn entirely through the fabric. Most fabric engravings do fine at 150 to 300 DPI.
Mistake 2: Acrylic Doesn’t Produce a Frosty White Engraving
More than likely, this is caused by using the wrong acrylic in the application. Two types of acrylics are typically used in laser engraving and both are suitable for different applications.
Cast acrylic sheets and objects are made from a liquid acrylic that is poured into molds that can then be set into various shapes and sizes. This type of acrylic is ideal for engraving because it turns a frosty white color when engraved, making it suitable for awards and plaques. It can be cut with a laser, but it won’t give projects flame-polished edges.
The other type of acrylic used in laser engraving is called extruded acrylic, which is formed into sheets by a machine. Extruded acrylic is generally less expensive than cast acrylic because it is formed through a higher-volume manufacturing technique. However, it does react very differently with the laser engraving machine. This type of acrylic cuts cleanly and smoothly and produces a flame-polished edge; however, when engraved, it doesn’t produce that frosted look, but rather a clear engraving. So make sure you are using cast acrylic if you want a frosted white finish.
Mistake 3: Inconsistent Glass Engraving
Oftentimes, when a laser strikes glass it will fracture the surface but not engrave deeply or remove the material needed to engrave fully. The fractured glass surface will produce a frosted appearance, but can be rough and chipped depending on the type of glass that is being engraved. While the frosted look is desired, no one wants a rough surface or chipping.
In order to produce a smooth frosted finish, try incorporating one or several of the tips below:
Use a lower resolution, about 300 DPI, which will produce a better result on glass as you separate the dots you are engraving.
Change the black in your graphic to 80 percent black.
Run your laser engraver with Jarvis Dithering (this dithering pattern can be found in Epilog’s print driver), which will help to provide a smooth finish.
Sometimes, applying a thin, wet sheet of newspaper or a paper towel to the engraving area will help with heat dissipation and improve the engraving process. Just make sure there are no wrinkles in the paper after it is applied.
Another way to dissipate heat is to apply a thin coat of liquid dish soap to the area you're engraving – either with your finger or a paper towel.
Finally, if there are shards of glass after engraving, polish the area with a non-scratch scour pad.
Mistake 4: Wood Engraving Produces Different Results on the Same Setting
Wood is one of the most laser-friendly materials available not only because it can be cut very easily, but also because it engraves very well.
However, different woods have different reactions when they are laser engraved and produce different results. Lighter woods, like cherry or maple, produce a nice contrast where the laser burns away the wood, while denser woods require more laser power to cut or engrave.
Grain density can change dramatically depending on the type of wood you are working with. Cherry, alder, walnut and maple have fairly small veins of grain in them, while oak has medium to large veins. For example, if a large square was engraved into a piece of cherry, it would have a very uniform appearance; the area engraved would be smooth with little variation in height. However, if the same square was engraved into a piece of oak, its appearance would vary greatly in height and would have a very non-uniform appearance.
Here are some tips when engraving with wood:
Maple and alder are some of the the most popular woods for engraving, providing a rich contrast.
Bare wood engraving produces smoke and debris during the process that can become embedded into the grain of the wood. To reduce this effect, always engrave from the bottom up – this helps draw any smoke away from the engraving.
When engraving stained wood, excess smoke and debris can be wiped off the surface of the wood with a damp cloth after engraving.
Contact White Dog Engraving
To learn more about our Dallas Texas engraving service, contact us today by clicking here.

How does laser engraving work?
White Dog Engraving is here to answer any questions you might have for your request. Call or send us an email.
Laser etching, laser marking, and laser engraving are all applications that can be satisfied by an industrial laser cutting machine. Laser machines vary significantly in their function and properties: there are CO2 laser engraving machines which primarily emit low-powered laser beams and could fit comfortably on your desk, and there are also high-powered fiber lasers that have been purposefully designed to facilitate high-volume laser marking and engraving applications in an industrial setting.
Different lasers vary based on the specific chemistry that they use to create the laser beam. In general, all laser cutting machines have three common components: the laser itself, the control system for the laser, and the marking surface. The operator of the machine uses a software program to modify settings on the laser cutter, including the power output of the laser and the speed of the controller that directs the laser across the material surface. These settings can be used to change the laser cutter application from laser engraving to laser etching or marking. An image chosen for engraving onto a given material must be produced with graphics editing software.
These include well-known applications such as Adobe Illustrator, Inkscape, and Adobe Photoshop, and AutoCAD that can produce vector files. Vector files have a special property that makes them ideal for the laser marking application: the images in vector files maintain their clarity and proportions when adjusted to any size. A saved vector file containing the desired image can be uploaded into the laser cutter software and translated into numerical data.
The laser cutter’s own software can take that data and use it to program the laser machine’s controller apparatus to produce the provided image using the laser. Conceptually, you might think about laser engraving machines as being similar to 3D printers. They both use digital designs to automate a creative process, but while a 3D printer functions by printing plastic blocks in the programmed pattern, the laser machine uses a programmed pattern to take something away from the material–leaving engraved text or a lasting image in its place.
Contact White Dog Engraving
For more information about our DFW engraving service, contact us today by calling (972) 848-7790 or click here.